This guide walks you through how to add or remove users from a shared mailbox in Emailgistics. The process has two parts: updating membership in Microsoft 365, then syncing those changes into Emailgistics.
Before You Start
You'll need one of the following Microsoft 365 admin roles:
- Exchange Admin with Help Desk privileges
- Global Administrator
Part 1: Update Membership in Microsoft 365
Start by making your changes in the Microsoft 365 Admin Center. Emailgistics mirrors whatever membership is set here.
- Sign in to your Microsoft 365 Admin Center and navigate to Teams & groups > Shared mailboxes in the left panel.
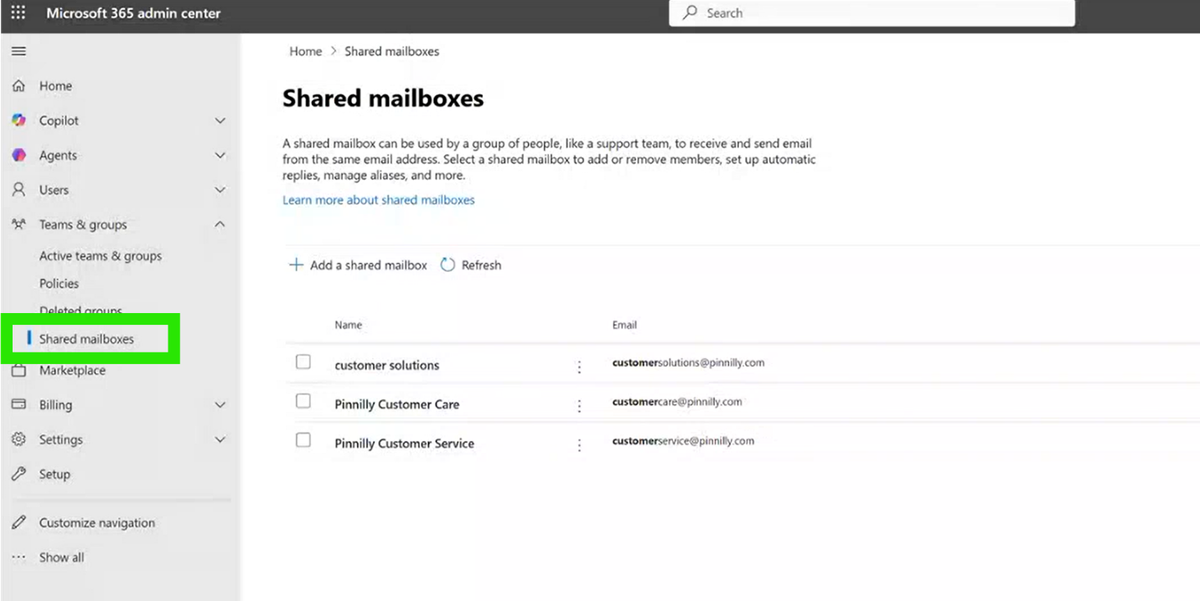
- Select the shared mailbox you want to update from the list.
- Scroll down to the Members section and click Edit.
- To add a user, click Add members and select the user. To remove a user, select the user and click Remove members. Save your changes.
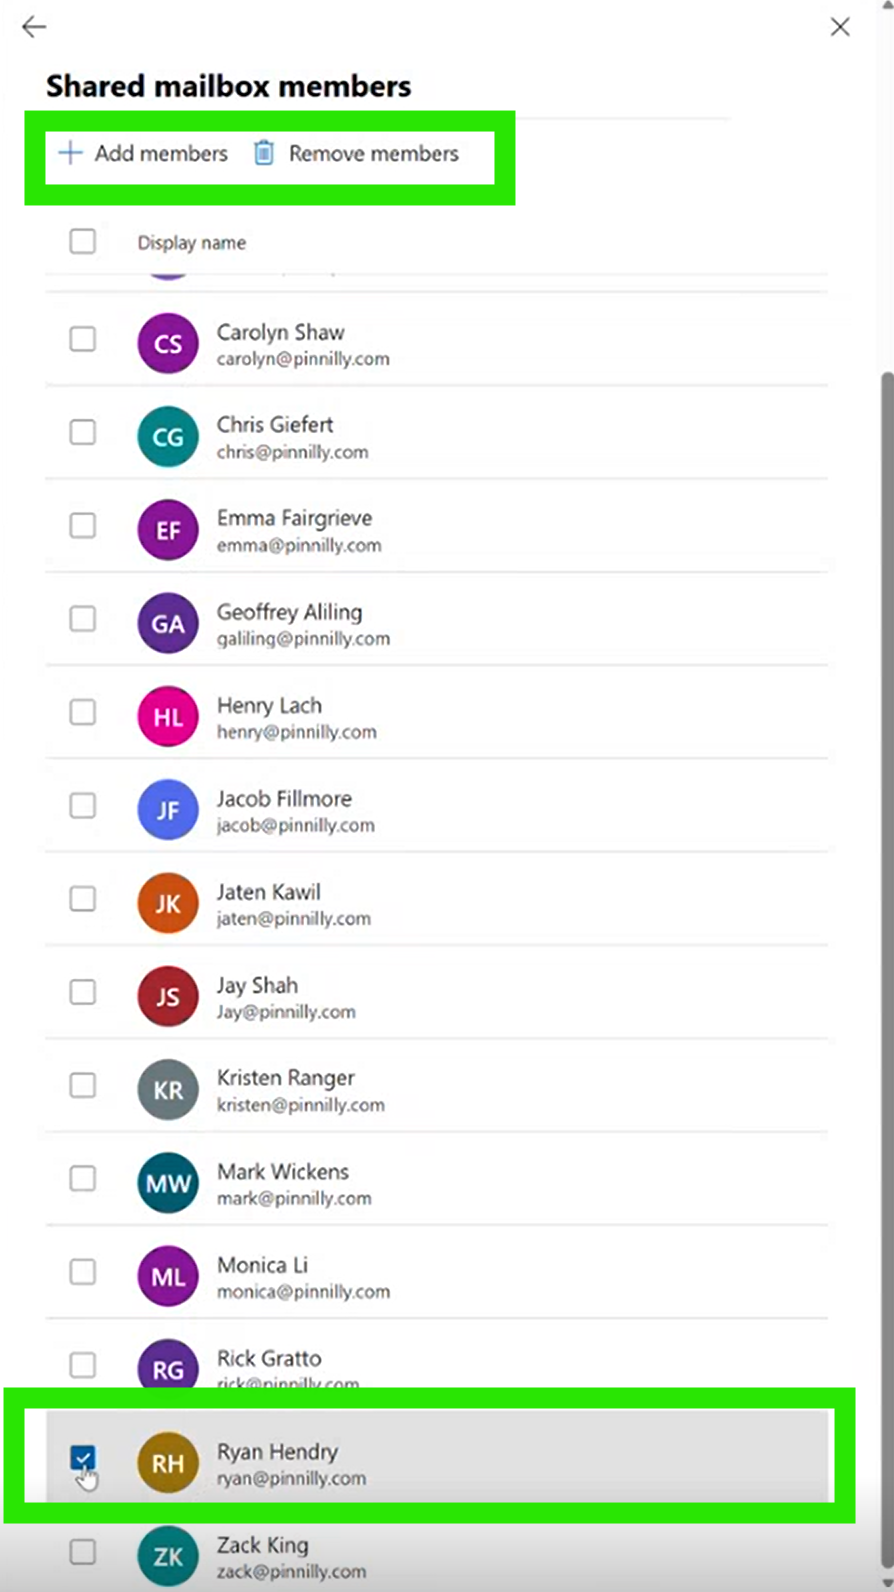
Note: Users must have Send As and Read and Manage permissions on the shared mailbox to access Emailgistics and sync correctly.
Part 2: Sync Changes into Emailgistics
Once membership is updated in Microsoft 365, run the Emailgistics sync script to apply those changes.
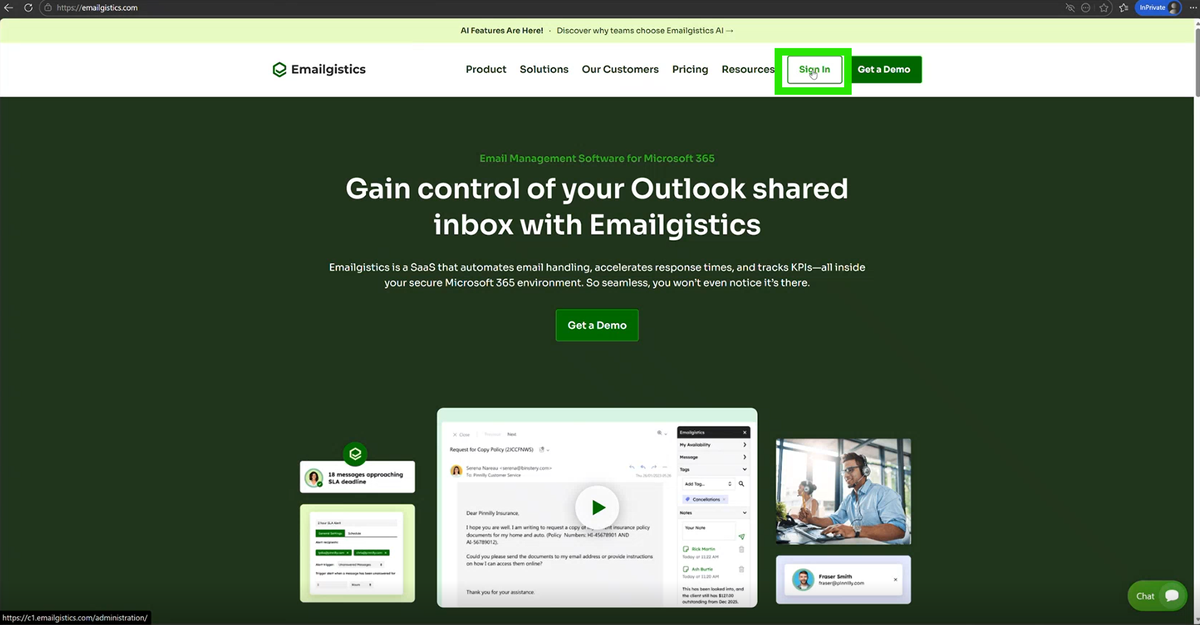
- Go to emailgistics.com and click Sign In to open the Emailgistics Admin Center.
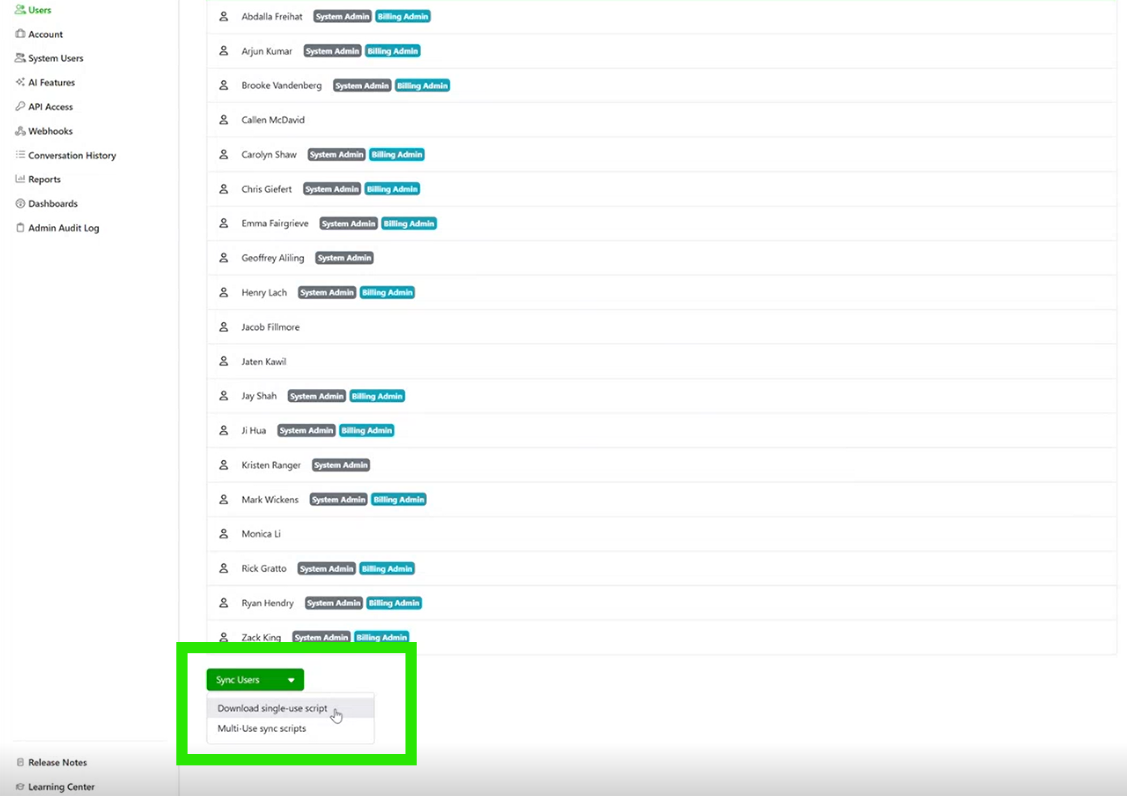
- In the left panel, navigate to Users.
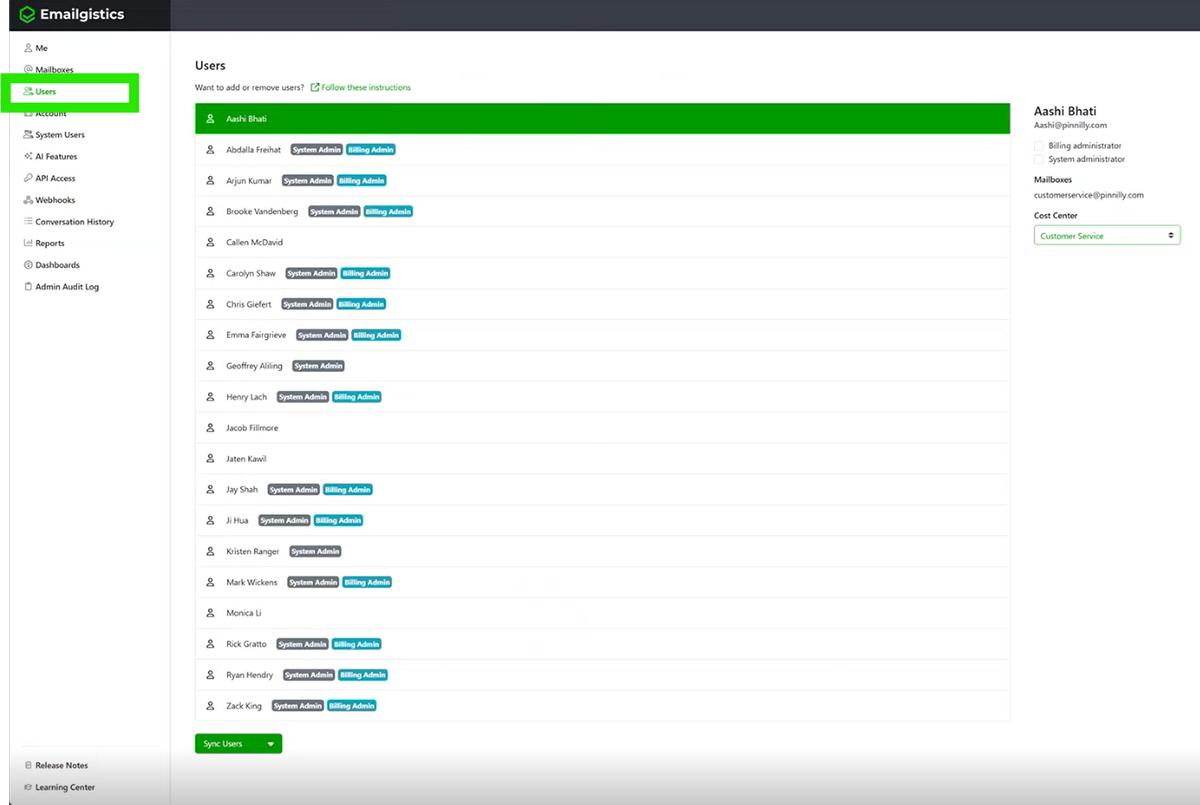
- At the bottom of the user list, click Sync Users and select Download single-use script from the dropdown.
- Extract the downloaded .zip file to your preferred location, then right-click the SyncUsers PowerShell script and select Run with PowerShell. You can also run it directly from a PowerShell window.
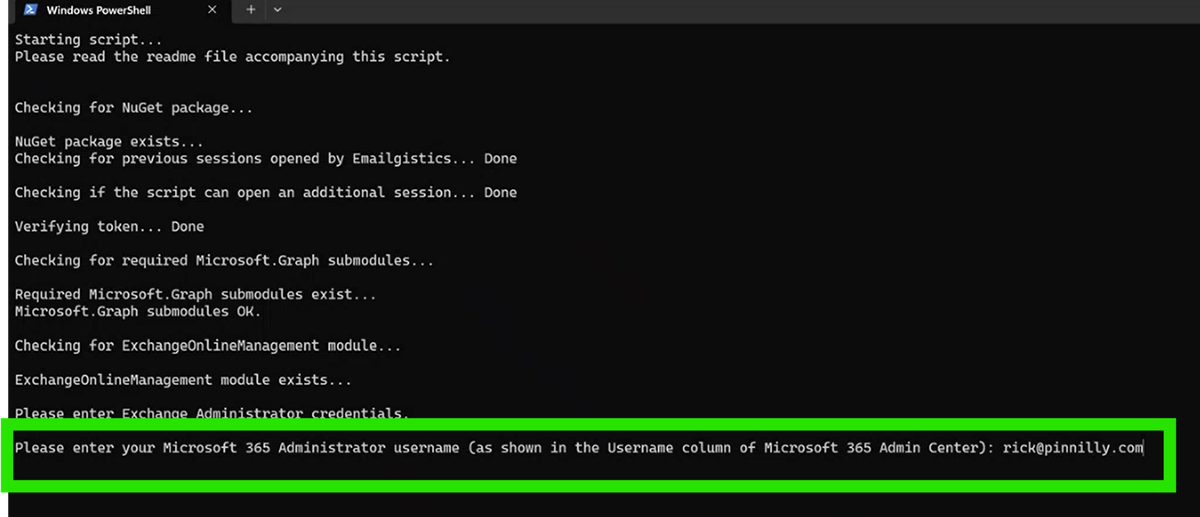
- The script checks for two required modules: Exchange Online Management and Microsoft Graph. If either is missing, it will prompt you to install it. Once checks pass, enter your Microsoft 365 admin email address when prompted.
Note: If either module is missing, you can install them manually using the commands below.
Microsoft Graph Module
Check if installed:
Get-InstalledModule -Name Microsoft.Graph*
Install (if not installed):
Install-Module -Name Microsoft.Graph -Scope CurrentUser
Exchange Online Management Module
Check if installed:
Get-InstalledModule -Name ExchangeOnlineManagement
Install (if not installed):
Install-Module ExchangeOnlineManagement -RequiredVersion 3.7.1 -Force
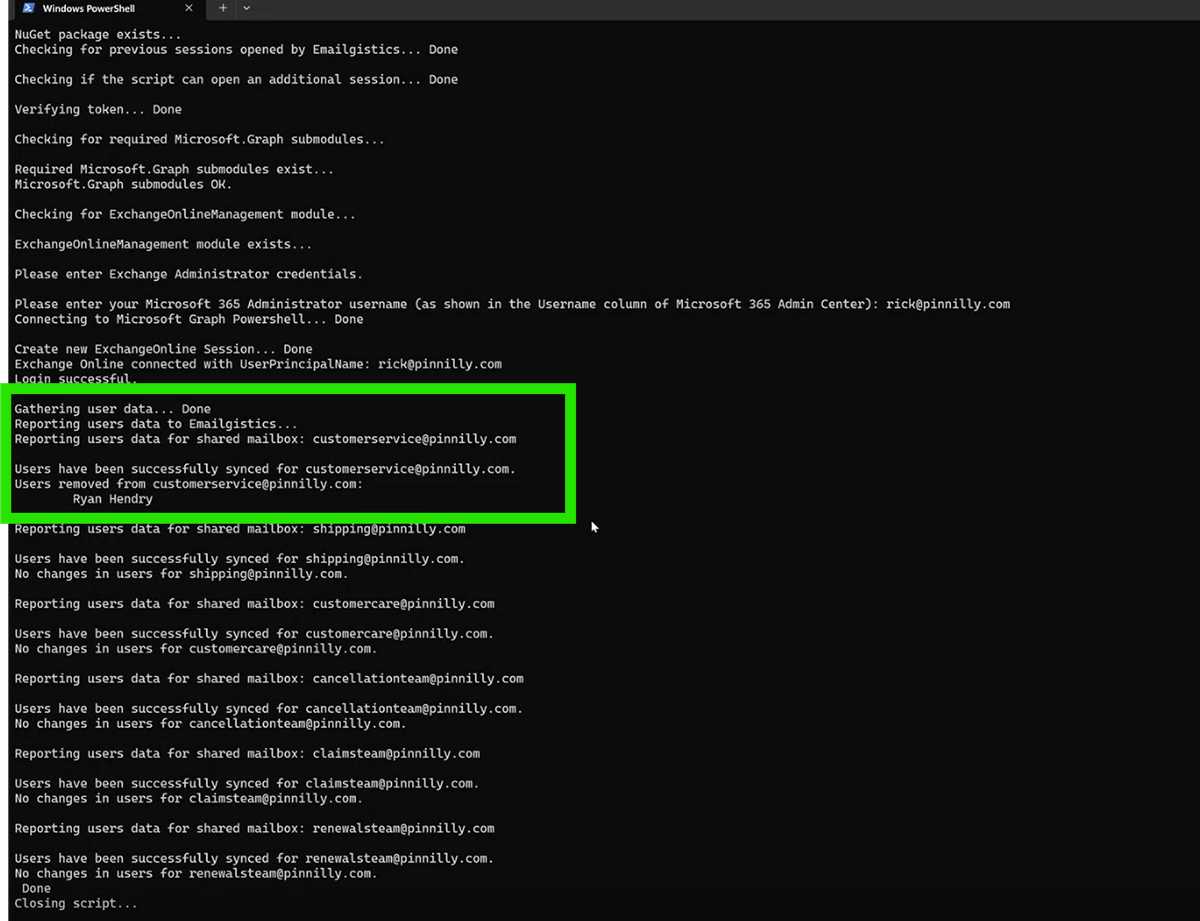
- Complete the Microsoft SSO sign-in when prompted. You'll be asked to authenticate twice — once for Microsoft Graph and once for Exchange Online. The script then runs and applies all membership changes.
What Happens After the Script Runs
Once the script completes:
- A summary of all changes is displayed in the PowerShell window.
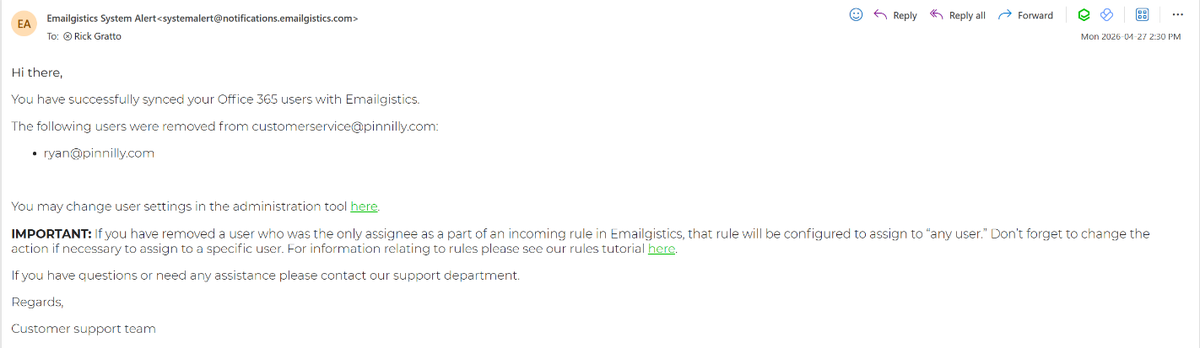
- Mailbox admins whose mailboxes had changes receive an email notification listing users added or removed.
- The script closes automatically.
Need Help?
- Email: [email protected]
- Web: emailgistics.com/contact-us
Want to Automate This Process?
See the Automated User Sync Options in Emailgistics lesson for how to schedule recurring syncs without running the script manually each time.