Installation Guide for Emailgistics Add-In for Microsoft Outlook
The Emailgistics add-in offers two installation methods:
- Installation via Microsoft Outlook Desktop Application: End-users can install the Emailgistics add-in directly from their Microsoft Outlook desktop application. Alternatively, Exchange or Office 365 administrators can deploy it across their organization via integrated apps. If you’re an admin looking to deploy the add-in to a group of users via Office 365, refer to Deploying Emailgistics add-in O365 GPO.
- Installation on Outlook Web Application (OWA): The Emailgistics add-in can also be deployed on OWA. Admins can push the add-in directly to shared mailboxes rather than individual user accounts. For instructions on installing the add-in for OWA, please refer to the ‘Install add-in for OWA’ section on the linked page . This method allows seamless integration of Emailgistics functionalities into shared mailboxes within OWA.
Installation for Outlook Desktop System Requirements
- Ensure that your Office 365 installation is on the Current Channel.
- You’ll need a version of Outlook from Office 365, specifically Outlook 2105 (build 14026.20246) or a newer release.
- You will need to be running Windows 10 or later.
If on a Mac please contact our support team: [email protected]
How to Check Your Version of Outlook:
- Open the Outlook Desktop App.
- Click on “File” and then select “Office Account.”
- On this page, you will find an “About Outlook” section that displays your version number.

Installing Emailgistics Add-In as a Custom Integration in Outlook 365
The Emailgistics Add-In enhances your Outlook experience by seamlessly integrating powerful features directly into your email client. To enable this integration, the Emailgistics Add-In is installed as a custom add-in in Outlook 365. This is accomplished using a file called a “manifest.”
A manifest file serves as a blueprint, guiding Outlook on how to incorporate the Emailgistics Add-In’s functionalities into your existing interface. Following the instructions below will help you seamlessly install and access the Emailgistics Add-In within Outlook 365.
**Add-in Installation Instructions for Outlook Desktop Application:
Obtaining** the Manifest File:
- Click the following URL to download the manifest file: /download/emailgistics_addin_v2.xml
- Save the file to a location on your machine — this is where the manifest file will be saved.
Adding the Add-In via Manifest File to Outlook:
- Open Outlook: Launch Microsoft Outlook on your desktop.
- Access Add-Ins: Navigate to the add-ins tab (depending on your Outlook version) and select Manage Add-ins.

- Add the Add-In:
- Click on + Add custom add-in.
- Choose Add from file…
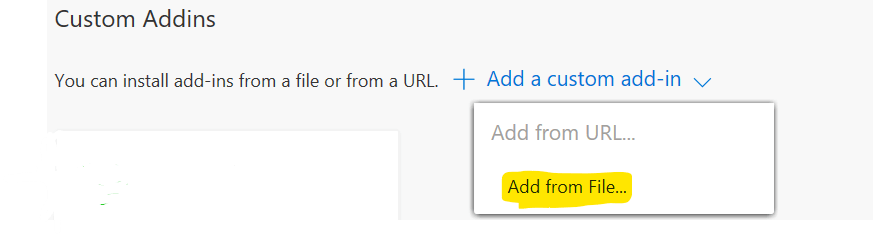
- Browse and select the emailgistics_manifest.xml file you saved earlier.

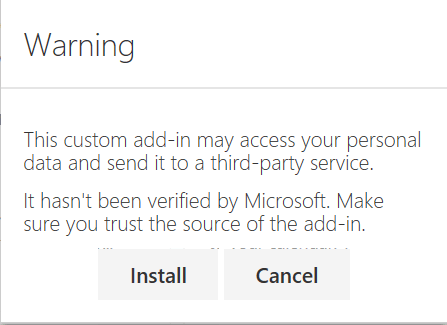
- Confirm and Install: Follow the prompts to confirm and install the Emailgistics Add-In.
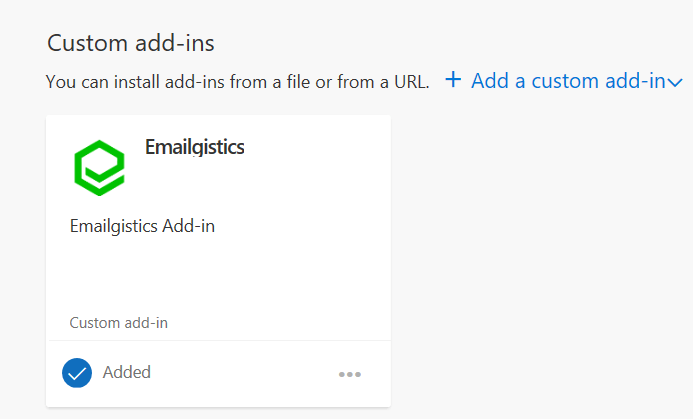
- The Emailgistics add-in should now be visible in the “Custom add-ins” section. You can close the add-ins window.
- The Emailgistics add-in will now be accessible in your Outlook ribbon.
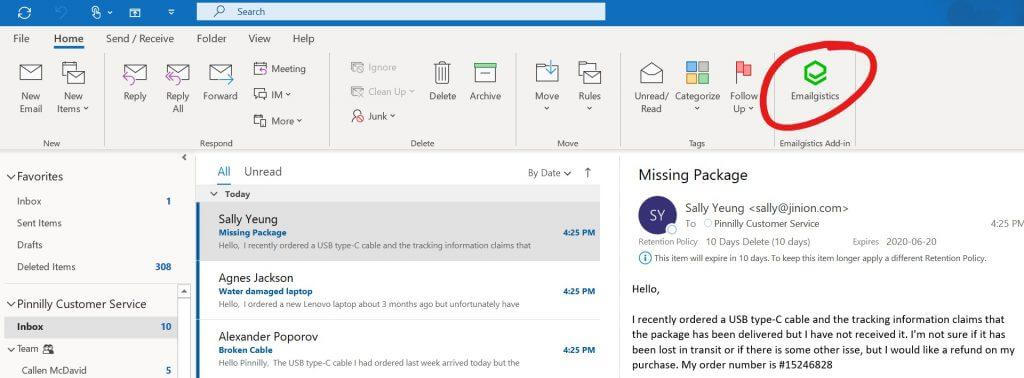
- Click it to open the add-in pane, and then select a shared mailbox message to work with. The first time you click the add-in button, you will be prompted to log in with your email account credentials.
Note: The Add-in pane will appear when you are viewing/reading a message a message within a team inbox using Emailgistics. The
Emailgistics add-in will also need to be opened for the first time when you are composing a message to access our Templates feature.
Tip: Consider pinning the Add-in pane to ensure it always appears whenever you select a message.
Installation for Outlook Web
System Requirements
Windows 10 or later machine with Powershell 5.1+
Note: The Emailgistics add-in requires that the shared mailbox be opened in a separate Outlook window; it will not work correctly for mailboxes opened within your main Outlook window.
Instructions
Prerequisites:
- You need to have Global Admin or appropriate permissions to manage Exchange Online.
Step 1: Open PowerShell
On your computer, open PowerShell. You may need to run it as an administrator.
Step 2: Connect to Exchange Online
Use the Connect-ExchangeOnline cmdlet to connect to Exchange Online. You will need to enter your Office 365 or Microsoft 365 administrator credentials.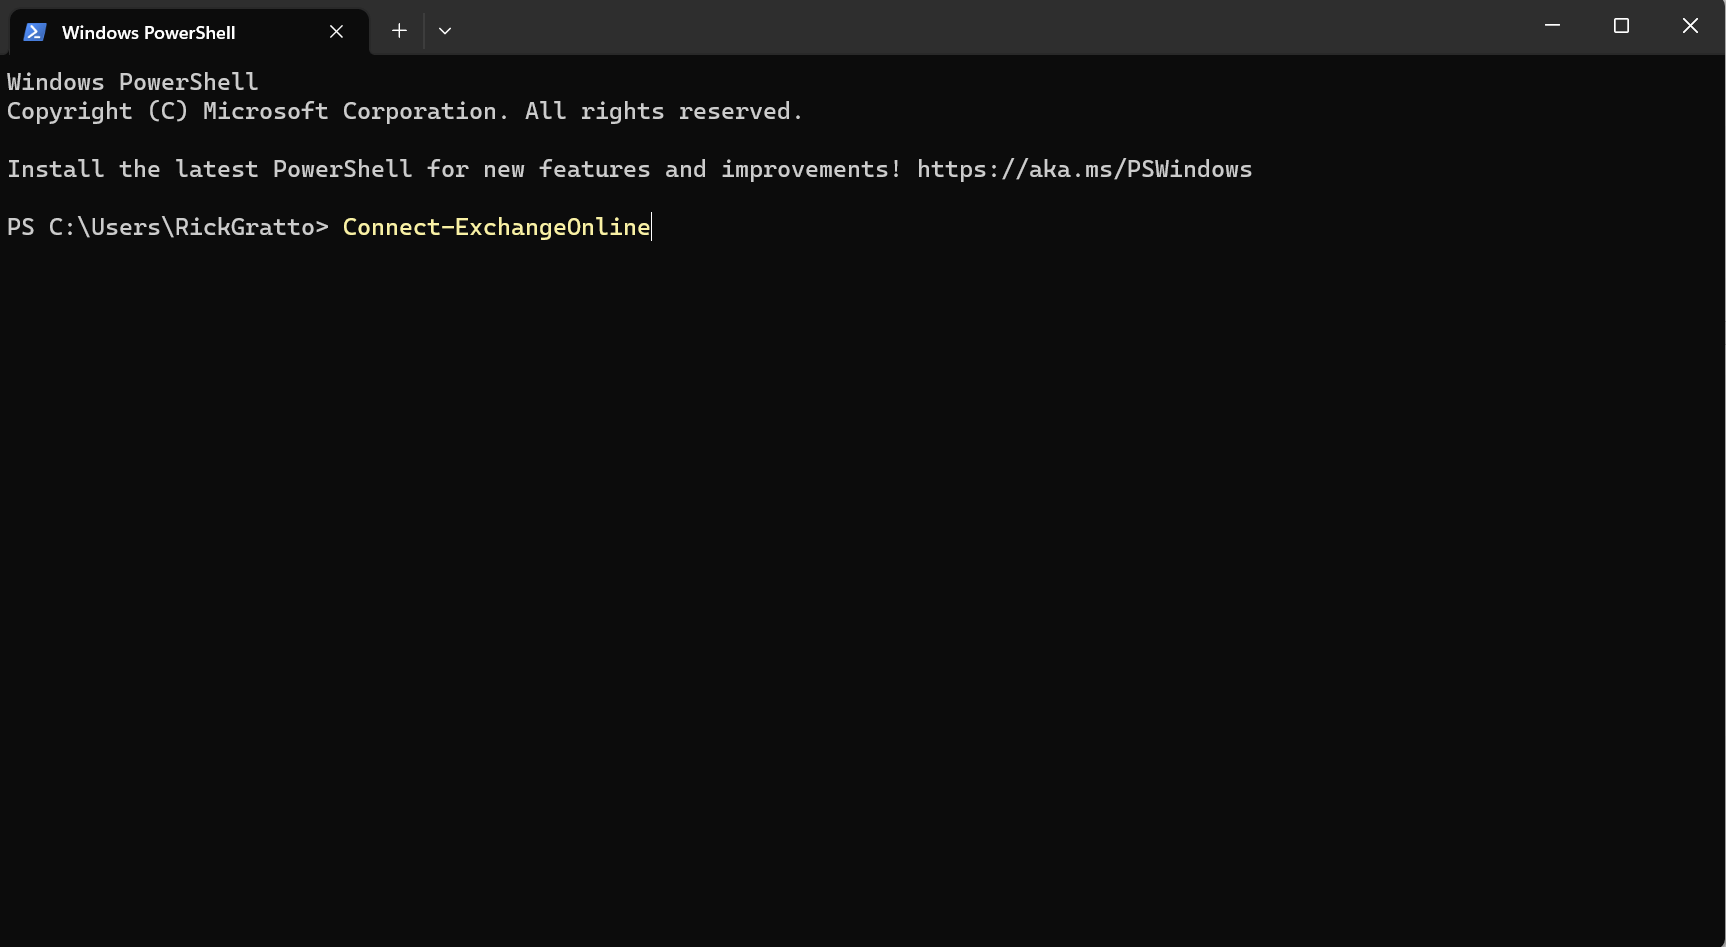
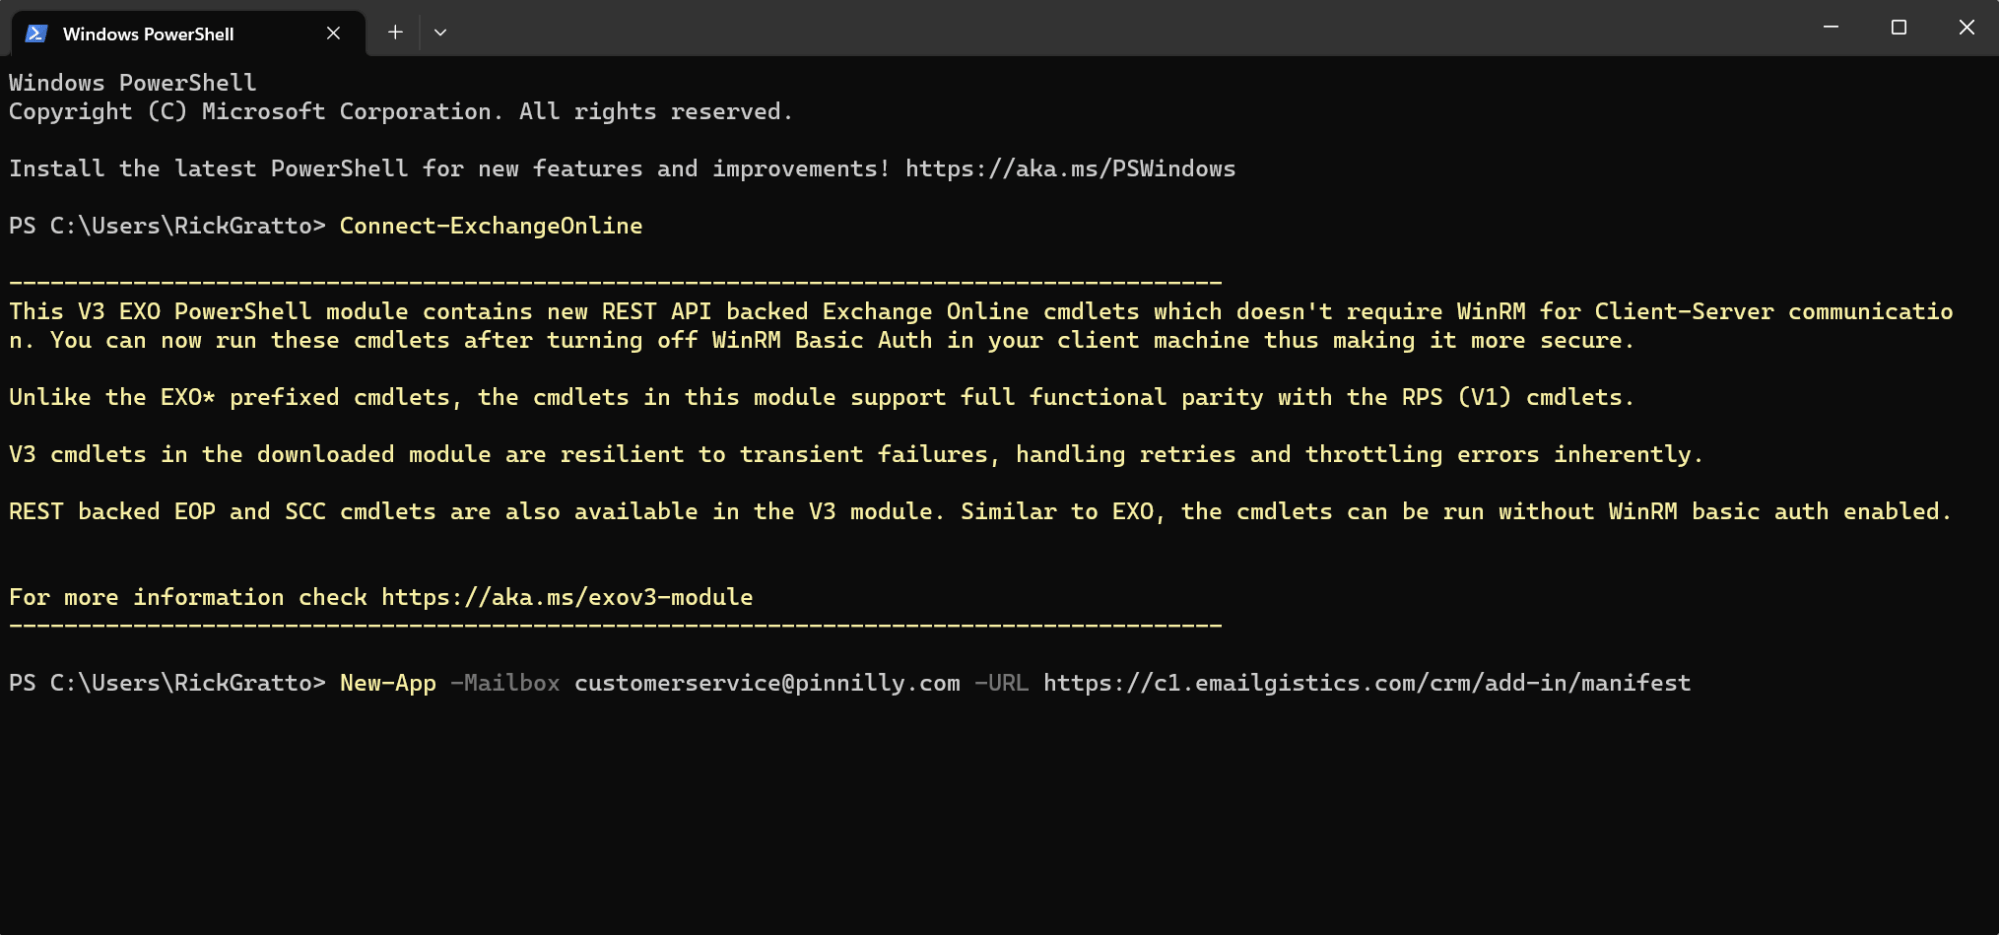
Step 3: Run the New-App Cmdlet
After successfully connecting, you can use
New-App -Mailbox [email protected] -URL https://c1.emailgistics.com/crm/add-in/manifest
to add the Outlook add-in to the shared mailbox. Make sure to specify the mailbox you want to add the add-in to and the URL:
New-App -Mailbox [email protected] -URL https://c1.emailgistics.com/crm/add-in/manifest
Step 4: Confirm and Wait
Review the command to ensure that the mailbox and manifest URL are correct. After confirming, run the command.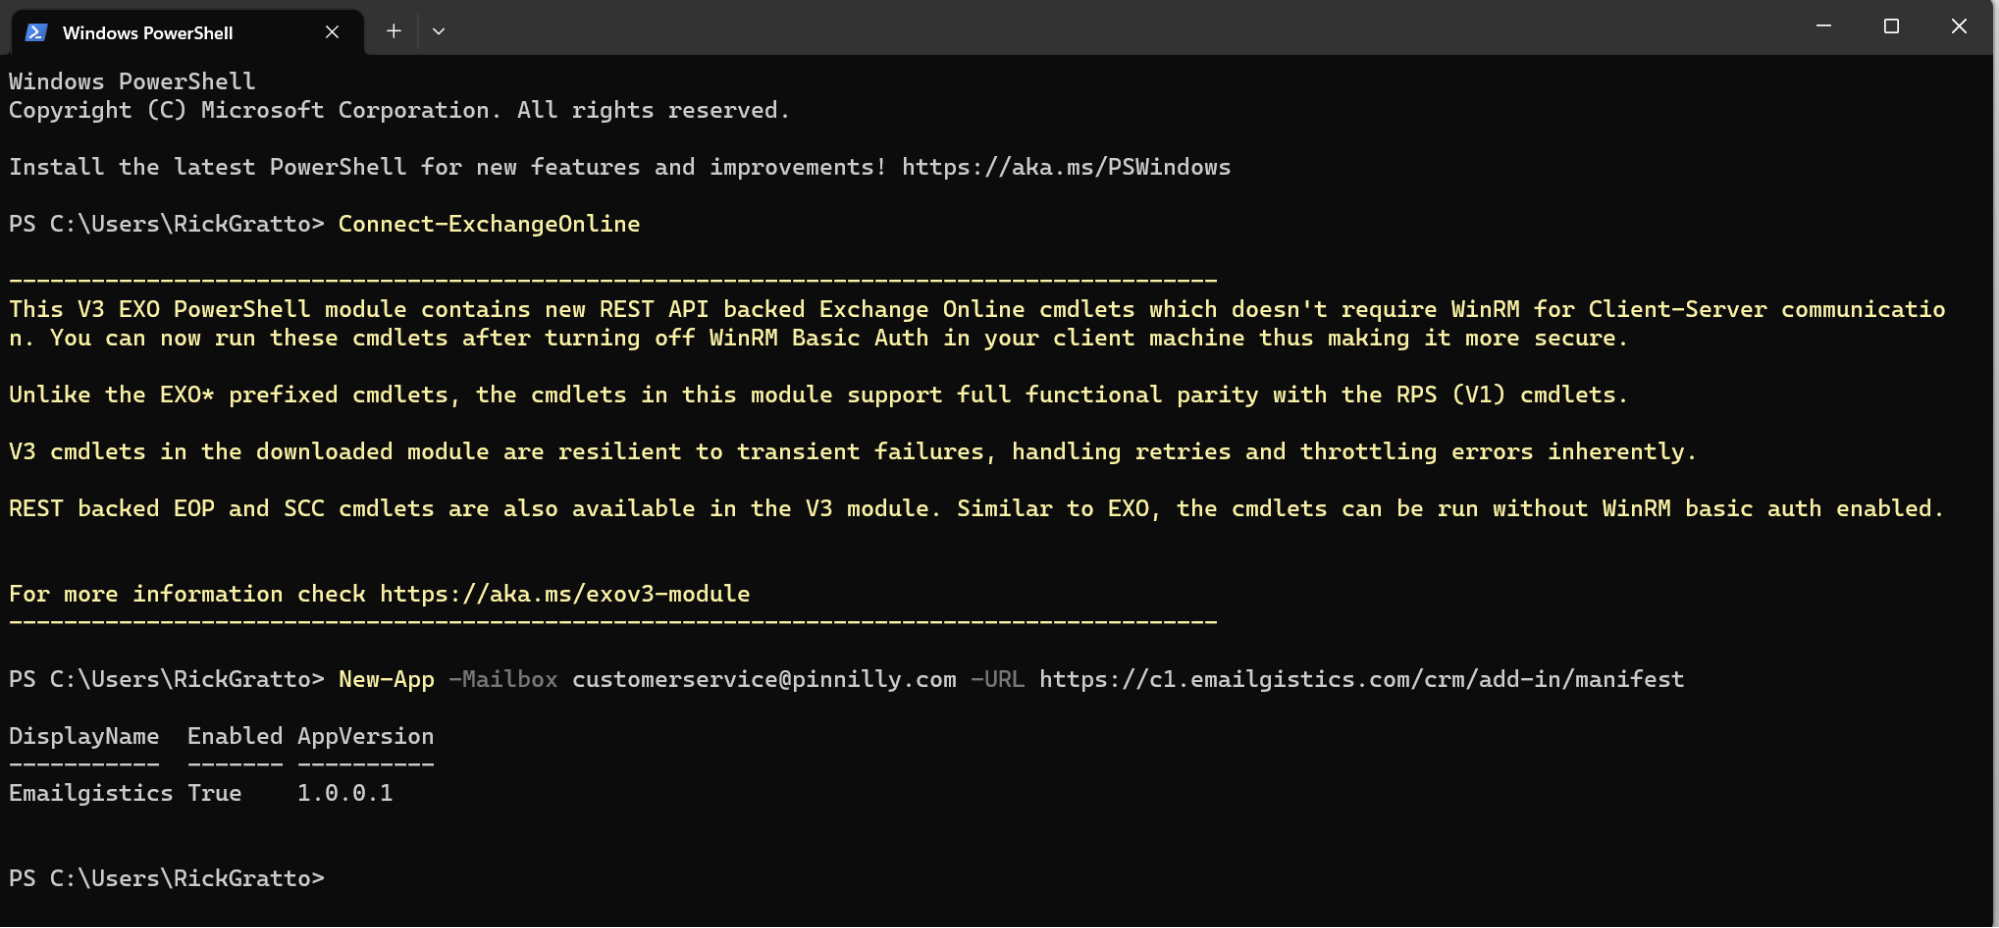
Step 5: Wait for Activation
It might take up to 24 hours for the add-in to become available in the shared mailbox. Once the add-in is active, users with access to the shared mailbox should be able to access and use the add-in in their Outlook web client
To access and utilize the add-in in Outlook Web App (OWA), please follow these steps:
- Sign in to OWA using your user ID.
- Click on your initials in the top right corner of the screen from the there Click on ‘Open another mailbox,

- Type in the name of the mailbox you wish to open (shared mailbox email address)
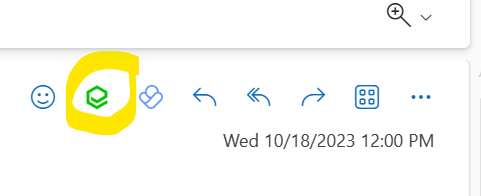
- To use the add-in, choose a team inbox message, and then click on the three dots in the upper right corner of the message content pane. You can find the Emailgistics add-in in the list of available options. The add-in may also appear in the ribbon of an open message.
If you have any questions or require any assistance please contact [email protected] and we will be happy to help.